screw spacing on drywall quotes
Understanding Screw Spacing on Drywall A Comprehensive Guide
When it comes to drywall installation, the significance of proper screw spacing cannot be overstated. Drywall, or gypsum board, is widely used in residential and commercial construction for its affordability, ease of installation, and fire resistance. However, the way it is fastened to the framing is crucial for ensuring structural integrity and a smooth finish. This article delves into the best practices for screw spacing on drywall, providing insights that can help both DIY enthusiasts and professional contractors.
The Importance of Proper Screw Spacing
Proper screw spacing enhances the stability of drywall sheets and prevents problems such as sagging, cracking, or even detaching from the wall over time. Correct spacing is especially important in high-traffic areas or ceilings, where additional weight can place stress on the fixtures.
Additionally, inappropriate screw placement can lead to challenges during the finishing process. For instance, close or uneven screw spacing can result in visible dimples or ridges after joint compound has been applied. Therefore, understanding the recommended screw spacing is vital for achieving a seamless appearance.
Recommended Screw Spacing Guidelines
The typical practice for installing drywall involves certain measurements when placing screws. Here are the general guidelines
1. Perimeter Screws When installing drywall sheets, screws should be placed around the perimeter of the board. The standard recommendation is to position screws every 12 inches along the edges. This spacing ensures that the edges are securely fastened and minimizes the risk of edge damage.
2. Field Screws In the field of the drywall sheet (the area away from the edges), screws should be spaced every 16 inches. This spacing is crucial for maintaining the strength of the drywall and provides adequate support to hold the board flat against the framing.
3. Ceiling Installation For ceilings, screws should be placed closer together to support the weight of the drywall against gravity. It is advisable to place screws every 12 inches both on the perimeter and in the field.
screw spacing on drywall quotes

4. Ridge or Valley Placement If you are working with tapered edges or installing drywall in a valley, ensure that screws are placed appropriately to accommodate these features. Tapered edges require screws to be positioned carefully to achieve a smooth transition at the joints.
5. Manual vs. Power Tools When installing drywall, the use of a power screwdriver or drill can expedite the process. However, it is important to avoid overdriving screws, as this can damage the paper face of the drywall and decrease its structural integrity.
Additional Considerations
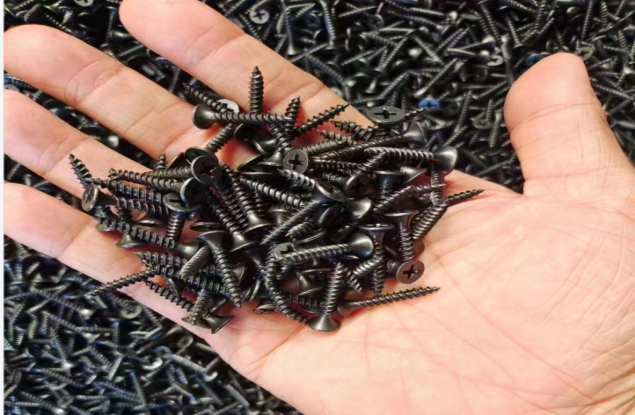
- Screw Type Use drywall screws specifically designed for this purpose. These screws have finer threads than regular wood screws and minimize the risk of splitting the drywall.
- Avoiding Overcrowding While it is tempting to place screws more closely than recommended, overcrowding does not necessarily strengthen the wall. In fact, it can lead to more complications during the finishing phase.
- Local Building Codes Always consult and adhere to local building codes and regulations, which may provide specific requirements regarding screw spacing and the overall installation of drywall.
- Consult Experts For complex projects or commercial applications, consider consulting a drywall installation expert. They can provide tailored advice based on your specific needs.
Conclusion
In summary, understanding and applying the correct screw spacing on drywall is essential for achieving a durable, aesthetically pleasing finish. Adhering to the recommended guidelines—12 inches on the perimeter and 16 inches in the field—ensures optimal support and minimizes issues during the finishing process. Whether you're an experienced contractor or a DIY hobbyist, paying attention to these details will significantly enhance the quality of your drywall installation.
-
Top Choices for Plasterboard FixingNewsDec.26,2024
-
The Versatility of Specialty WashersNewsDec.26,2024
-
Secure Your ProjectsNewsDec.26,2024
-
Essential Screws for Chipboard Flooring ProjectsNewsDec.26,2024
-
Choosing the Right Drywall ScrewsNewsDec.26,2024
-
Black Phosphate Screws for Superior PerformanceNewsDec.26,2024
-
The Versatile Choice of Nylon Flat Washers for Your NeedsNewsDec.18,2024


