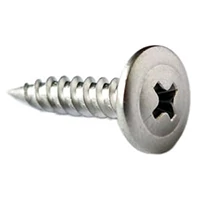
Best Practices for Installing Screws in Drywall Ceilings to Ensure a Secure Finish
Screw Pattern for Drywall Ceiling An Essential Guide
Installing drywall on ceilings is a crucial step in creating a polished look for any interior space. The right screw pattern not only ensures that the sheets are securely attached but also minimizes the risk of sagging and promotes durability. This article provides an overview of the recommended screw pattern for drywall ceilings, along with some best practices for a successful installation.
Understanding Drywall Ceilings
Drywall ceilings are typically composed of gypsum boards, which serve as a lightweight and fire-resistant covering for ceilings. When installing drywall, particularly on ceilings, the weight of the boards requires careful consideration to ensure they remain securely in place over time. An improper screw pattern can lead to problems such as cracking, popping, or even sagging, which not only affects the aesthetic but also the integrity of the finished ceiling.
Recommended Screw Pattern
The standard practice for attaching drywall to a ceiling involves spacing screws at specific intervals. Here’s a breakdown of the typical screw pattern for drywall ceilings
1. Screw Spacing Generally, screws should be spaced 12 inches apart along the edges of the drywall sheets and 16 inches apart in the field (the areas away from the edges). This spacing helps distribute the weight evenly and provides ample support.
2. Placement When positioning screws, they should be placed about ¾ inch from the edges of the drywall. It is important to drive screws straight and ensure they are slightly embedded into the gypsum without breaking the paper surface. A depth-setting screw gun can help achieve consistent results.
3. Edge vs. Field Screws The edges of the drywall sheets typically require more screws because they receive additional stress. The field screws hold the central areas of the sheets in place. Make sure not to overdrive the screws, as this can damage the drywall’s surface.
screw pattern for drywall ceiling

Best Practices for Installing Drywall Ceilings
1. Use the Right Tools A screw gun or power drill with a depth-setting feature is ideal for driving screws. It helps prevent overdriving and creates a clean finish.
2. Pre-drill Holes in Certain Situations If you’re working with thicker drywall or if the boards are particularly heavy, pre-drilling holes can help prevent splitting the gypsum.
3. Apply Adhesive for Added Stability Consider applying construction adhesive along the framing before fastening the drywall. This can add extra support and reduce the risk of sagging.
4. Consider the Direction of Installation When attaching drywall to the ceiling, it’s generally best to place the sheets perpendicular to the framing. This helps in providing better support and reduces the chances of sagging.
5. Check Local Building Codes Always verify that your installation complies with local building codes, which may have specific requirements regarding distances, screw types, and other parameters.
Conclusion
A well-executed screw pattern is essential for the integrity and longevity of drywall ceilings. By adhering to the recommended spacing and following best practices, DIY enthusiasts and professionals alike can achieve a seamless and aesthetically pleasing finish. Proper installation not only enhances the appearance of a room but also contributes to its overall durability and value. Investing time and effort in the right screw pattern will pay off in a stable and beautiful ceilings that stand the test of time.
-
Top Choices for Plasterboard FixingNewsDec.26,2024
-
The Versatility of Specialty WashersNewsDec.26,2024
-
Secure Your ProjectsNewsDec.26,2024
-
Essential Screws for Chipboard Flooring ProjectsNewsDec.26,2024
-
Choosing the Right Drywall ScrewsNewsDec.26,2024
-
Black Phosphate Screws for Superior PerformanceNewsDec.26,2024
-
The Versatile Choice of Nylon Flat Washers for Your NeedsNewsDec.18,2024


